Industry News
 2026.07.17
 Industry News
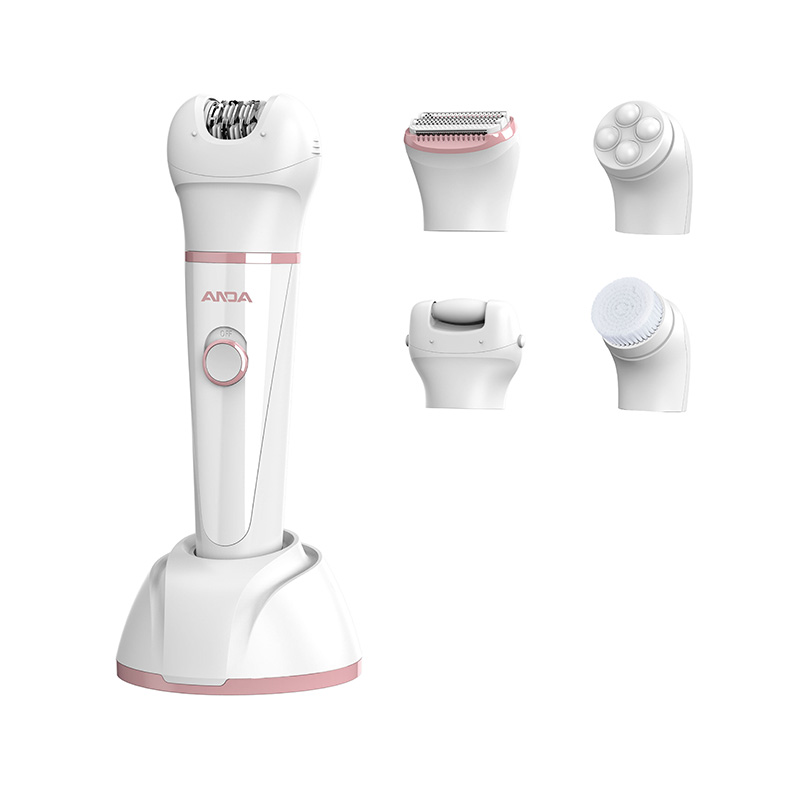
Anyone who uses a shaver regularly knows the routine. Use it, rinse it, put it away. Many people pay attention to the rinsing part. The drying part tends to get rushed. A USB Lady Shaver placed into storage while still damp will show the consequences eventually. The effects do not always appear straight away. They accumulate slowly over weeks or months.
Where the shaver gets stored influences how much trouble moisture causes. A closed drawer traps humidity. A bathroom cabinet stays damp from showers. A travel case seals everything inside. When a wet shaver goes into any of these spaces, the water has nowhere to evaporate. It sits on the blades. It lingers around the USB connection. It seeps into the small gaps where parts meet.
The results are rarely dramatic. The blades might not cut as cleanly after a while. The charging cable might need adjusting to make contact. A musty smell might develop in the blade area. Each issue seems small on its own, but together they shorten how long the device stays useful. Taking a few extra seconds to dry the shaver properly helps avoid these gradual declines.
Water left in contact with metal sets off reactions that affect how the shaver works. The blades, fine and precisely shaped, start to show corrosion over time. The foil, the thin mesh that covers the blades, loses strength where moisture sits against it. Cutting performance drops slowly, and the user may not notice until the shaver no longer works like it used to.
The USB charging port also suffers from moisture exposure. Water around the metal contacts causes problems when the charging cable gets connected later. Corrosion builds up on the contacts, making the electrical connection less reliable. Charging may take longer, or the device may not charge at all.
Hygiene adds another concern. The blade area holds tiny particles of skin, hair, and oils. Add moisture, and conditions become favourable for bacteria and mould. The combination does not create an immediate health emergency, but it produces an unpleasant situation that users would rather avoid.
After rinsing the shaver, the step involves removing the bulk of the water. Shake it gently over a sink, letting the water fall away from the blade head and the handle. Too much force can damage the internal parts, so controlled shakes work better than vigorous ones.
A dry cloth takes care of the remaining moisture. Pat the blade assembly, paying close attention to the foil and cutter block. These parts trap water in small spaces. Patting, rather than rubbing, keeps the foil from tearing or bending. Wipe the handle and the exterior until no water droplets remain visible.
Leaving the shaver out in the open for a few minutes lets any lingering moisture evaporate. A clean, dry surface provides a good spot for this final air-drying step. The process takes very little time and makes a real difference.
A few simple practices make drying more effective:
The blade and foil hold moisture longer than any other part of the shaver. The foil, a fine metal mesh, traps tiny droplets of water. The cutter block, with its small moving blades, also retains moisture. Giving these areas extra attention during drying prevents water from staying against the metal for extended periods.
The USB port requires care as well. Moisture inside the port can cause electrical problems and corrosion. Patting the port area with a cloth removes visible water. Using anything to poke inside the port is unnecessary and can damage the contacts.
Seams and gaps collect water during rinsing. Water runs between the blade head and the handle and may stay there even after the outside looks dry. A gentle shake helps trapped water drain out before the final wipe.
Where the shaver sits after rinsing changes how quickly it dries. An open spot with good airflow allows moisture to evaporate much faster. A confined space, like a drawer or a bag, holds moisture in and slows the drying process.
Room temperature plays a role too. Warmer rooms evaporate moisture more quickly. The shaver should not go near direct heat sources that could melt or warp plastic parts, but normal room temperature works well for drying.
Simply setting the shaver in a clean, open area and giving it time to air out provides enough drying for situations. No fan or special equipment is needed.
Connecting a damp shaver to a charger carries some risk. The USB port contains metal contacts that carry electrical current. Water in the port can create a path for electricity where it does not belong. A short circuit might damage the charging circuit or the power source.
Moisture around the charging contacts also affects the quality of the connection. Water and corrosion buildup increase electrical resistance. The device may charge slowly or stop charging partway through. The problem often gets blamed on the cable or the power source when the real issue sits right at the charging port.
Getting into the habit of checking for dryness before plugging in takes almost no time. A quick look at the charging port, a touch with a dry cloth if needed, and the connection goes smoothly. Avoiding moisture-related charging issues saves frustration and prevents damage.
Where the shaver lives between uses affects how well it stays dry. A spot that stays dry naturally, away from sinks and showers, works better than a bathroom cabinet where steam collects. The storage area should offer some air circulation rather than sealing the shaver in an airtight space.
A storage pouch or case can protect the shaver from dust and scratches, but the case needs to allow some airflow. A completely sealed case traps any moisture that might have been missed during drying. A pouch with breathable material or a case with small ventilation openings works better.
A few simple storage points:
| Storage Location | Air Circulation | Moisture Exposure | Suitability for a USB Lady Shaver |
|---|---|---|---|
| Open shelf in bedroom | Good | Low | Well suited |
| Bathroom cabinet | Limited | High | Less suitable |
| Travel bag or case | Very limited | Moderate | Suitable only when fully dry |
| Drawer with vent holes | Moderate | Low | Suitable if area stays dry |
| Sealed plastic container | None | Trapped moisture | Not recommended |
Every use of the shaver calls for the same drying routine. A quick shake, a wipe with a cloth, and a short air-dry take very little time. Skipping the drying steps once in a while may not cause immediate problems, but making it a habit increases the chances of long-term reliability.
Seasonal changes affect drying needs as well. In humid months, moisture in the air slows evaporation. The shaver may take a bit longer to dry fully. In dry months, air exposure alone may be enough to remove all moisture. Paying attention to the conditions helps adjust the drying routine accordingly.
If the shaver sits unused for a longer stretch, checking its condition before storage makes sense. Making sure it is completely dry before putting it away for weeks or months prevents problems from developing during the idle period.
Corrosion appears on the blade surfaces. A reddish or brownish discolouration shows on the metal where moisture sat against it. The blades may feel rough or look dull. Cutting performance declines, and the shaver may pull hair rather than cutting it cleanly.
The USB port shows different signs of trouble. The device may not charge consistently. The charging cable may need repositioning to make contact. The port itself may look discoloured or have visible residue around the contacts.
Unusual sounds during operation also point toward moisture damage. Grinding or rattling noises from the blade area can mean corrosion or mineral deposits have formed. These sounds should not be ignored because they indicate damage that will only get worse over time.
A few signs to watch for:
Small actions repeated consistently produce good results over time. A shaver that gets dried properly after each use arrives at its storage spot in good condition. Moisture does not stay against metal surfaces, so corrosion does not develop. The USB port stays clean, so charging remains reliable.
The practice of drying and proper storage costs nothing and takes very little time. The payoff shows up in longer life for the shaver. A device that gets dried consistently may last noticeably longer than one that gets put away wet. The user who develops a good drying habit protects their investment without any additional expense.
Establishing a drying routine matters. The steps become automatic, and the shaver stays in good condition through years of regular use. The same applies to other devices that see similar treatment. Keeping moisture away from electronics and metal parts extends life, reduces problems, and avoids the frustration of dealing with damage that could have been prevented.
Recommended Products

No.377. Fourth Avenue, Binhai Park, Economic-Technological Development Zone, Wenzhou, Zhejiang, China.

+86-577-88912812

+86-577-88912822

anda1@andaelectric.com
anda6@andaelectric.com
anda7@andaelectric.com
Copyright © Zhejiang Anda Electric Co., Ltd. Rights Reserved.
Electric Hair Clipper Manufacturer



 English
 Español
 русский